An odometer is crucial in any vehicle tracking the total distance traveled. This measurement is essential for maintenance schedules and plays a significant role in the vehicle’s resale value. When an odometer begins blinking, it often signals an underlying issue within the vehicle’s electrical system or dashboard. Such issues can range from minor software glitches to more complex electrical faults.

Understanding “how to fix blinking odometer” becomes essential to address these problems and ensure the accuracy of mileage data. This guide will provide a comprehensive overview of steps you can take to diagnose and fix a blinking odometer, empowering you with the necessary knowledge to resolve the issue effectively. By tackling this problem, you ensure that your vehicle maintains its performance and value over time.
Understanding the Odometer System
What is an Odometer?
An odometer is an essential device in any vehicle, and it is responsible for recording the total distance traveled. This data is crucial not only for scheduling routine maintenance but also for determining the vehicle’s resale value. There are two main types of odometers: mechanical and digital.
Mechanical odometers rely on a series of gears and wheels to physically display the distance traveled, often seen in older vehicle models. Conversely, digital odometers use electronic signals and a digital display to provide a reading, which is more common in modern vehicles. Regardless of the type, both serve the critical function of tracking mileage.
Overview of the Components Involved in the Odometer System
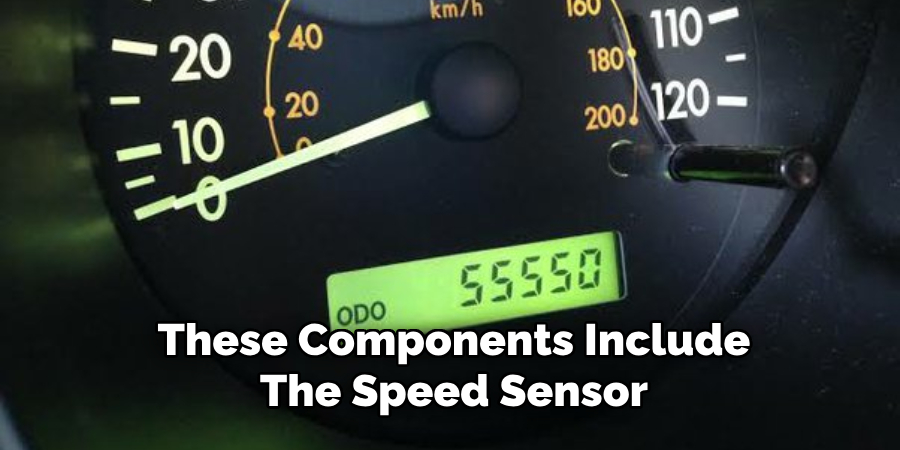
The odometer system comprises several key components that ensure accurate mileage tracking. These components include the speed sensor, which measures the vehicle’s speed and sends this data to the odometer. Additionally, wiring plays a crucial role in transmitting electrical signals between the speed sensor, dashboard, and other systems.
The dashboard assembly itself houses the odometer display alongside various other gauges and indicators, all of which are interconnected. These components must function in harmony to ensure the odometer provides precise readings.
Common Causes of a Blinking Odometer
Several factors can contribute to a blinking odometer, signaling a potential issue within the system. A faulty speed sensor or wiring problem can disrupt the signal needed for accurate readings, leading to erratic behavior. Electrical issues, such as blown fuses or faulty connections, can also affect the odometer’s functionality.
Software glitches or calibration issues with digital odometers might cause them to blink inconsistently. Lastly, problems within the instrument cluster or dashboard assembly, such as loose connections or defective components, can interfere with the proper operation of the odometer.
Symptoms Associated with a Blinking Odometer
A blinking odometer is often accompanied by other signs that can indicate underlying issues. These symptoms may include erratic speed readings as disruptions in the signal or faulty wiring affect the odometer’s ability to track speed accurately. Malfunctioning warning lights on the dashboard might also appear, indicating potential electrical or communication issues within the vehicle’s system.
Furthermore, a blinking odometer might exhibit intermittent patterns, stopping and starting at irregular intervals, which can confuse the driver and signal the need for further investigation and diagnosis. Recognizing these symptoms early is vital to address any underlying problems and maintain the vehicle’s accuracy and reliability.
How to Fix Blinking Odometer: Initial Diagnosis
Visual Inspection of the Dashboard
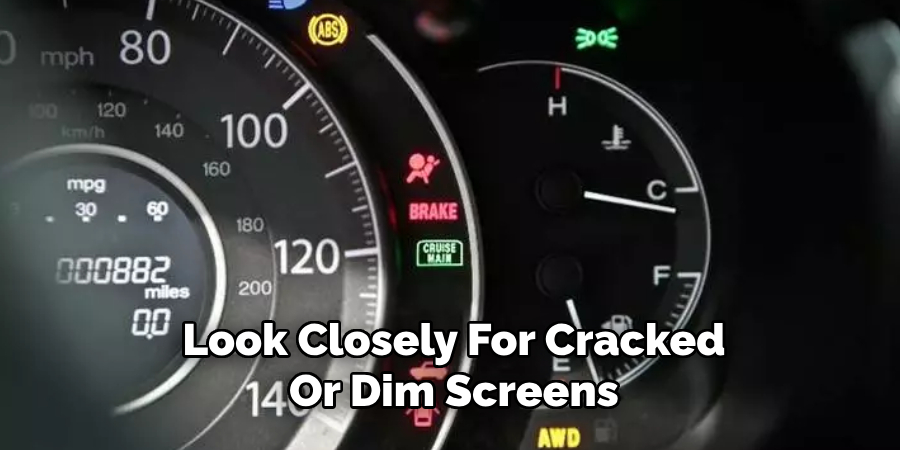
Embarking on the initial diagnosis of a blinking odometer involves a thorough visual inspection of the dashboard. Examine the odometer display and surrounding gauges for any visible signs of damage or wear. Look closely for cracked or dim screens, which can indicate underlying issues. Ensuring that all gauges are properly aligned and functioning without obstruction is crucial.
Additionally, inspect the dashboard for any protruding or misaligned components that might suggest wear or tampering. Carefully examine the connections behind the dashboard; loose connections can often cause an odometer to blink or malfunction. Verify that all wires are securely attached, and ensure the dashboard itself is firmly fitted with no loose panels or gaps. This step is essential as it often pinpoints potential issues, saving time and effort in further diagnostics.
Testing the Speed Sensor
After completing the visual inspection, the next step involves testing the vehicle’s speed sensor, which is integral to accurate odometer readings. Begin by locating the speed sensor, typically on the vehicle’s transmission or wheel hub. Consult the vehicle’s manual for its precise location. Once located, use a multimeter to test the sensor’s functionality. Set the multimeter to measure resistance and connect the probes to the sensor terminals.
A functional speed sensor will display a consistent reading within the manufacturer’s recommended range. Any deviations suggest a malfunction. Consider testing the voltage output as well by shifting the multimeter settings accordingly, ensuring the readings align with expected values. If the sensor fails these tests, it may require replacement. Faulty speed sensors can send incorrect data, leading to inaccurate odometer readings and a blinking display. Thus, diagnosing and addressing issues at this juncture is vital for maintaining the odometer’s reliability and accuracy.
How to Fix Blinking Odometer: Common Repairs and Solutions
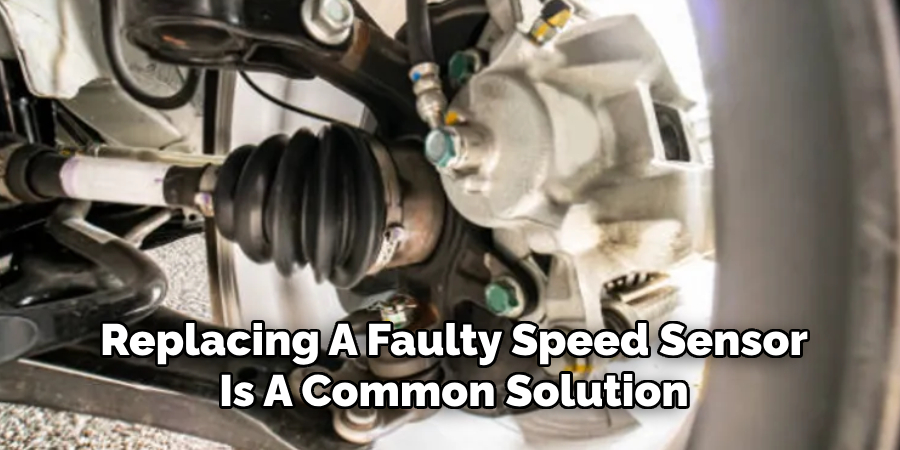
Replacing the Speed Sensor
Replacing a faulty speed sensor is a common solution to resolve a blinking odometer. Begin by securely elevating the vehicle using a jack and placing jack stands for safety. Locate the speed sensor, often found on the transmission or attached to the wheel hub, and consult the vehicle manual for the exact location.
Before removal, disconnect the negative battery terminal to prevent any electrical shock or short circuits. Carefully detach the electrical connector attached to the sensor. Remove the bolts securing the sensor to the mounting point using the socket wrench. If specified, adhere to the torque specifications provided by the manufacturer to prevent damage upon installation of the new sensor.
Once the old sensor is removed, align the new sensor correctly at the mounting spot and secure it with bolts, ensuring they are torqued to the manufacturer’s recommendations. Reattach the electrical connector and restore the battery connection. The new sensor’s proper alignment and secure connection are crucial for ensuring accurate data transmission to the odometer.
Checking and Replacing Fuses
Fuses play a vital role in the proper functioning of the odometer and must be checked if erratic readings occur. To begin, locate the vehicle’s fuse box, which is typically found under the dashboard or in the engine compartment.
Refer to the vehicle’s manual for the specific location and the fuse diagram. Identify the fuse associated with the odometer and instrument cluster. Once located, visually inspect the fuse for any signs of damage, such as a broken filament or burn marks. If a blown fuse is detected, replace it with a new fuse that matches the specified amperage rating.
Use fuse pullers or tweezers for a safe removal and insertion process. Replacing damaged fuses ensures proper electrical flow and restores functionality to the odometer system.
Inspecting Wiring and Connectors
The vehicle’s wiring and connectors are crucial for accurate odometer readings. Begin with a detailed inspection of the wiring harness and connectors connected to the odometer system.
Look for any signs of wear, corrosion, or physical damage affecting the wires and connectors. Such issues can disrupt the signal flow and lead to malfunctioning components. If any damaged wiring or connectors are found, proceed with repair by stripping the damaged section and using appropriate connectors or soldering to ensure a secure fit.
Replace severely damaged wires entirely to prevent future issues. Addressing any wiring or connector issues is critical for restoring regular odometer functionality and preventing intermittent failures.
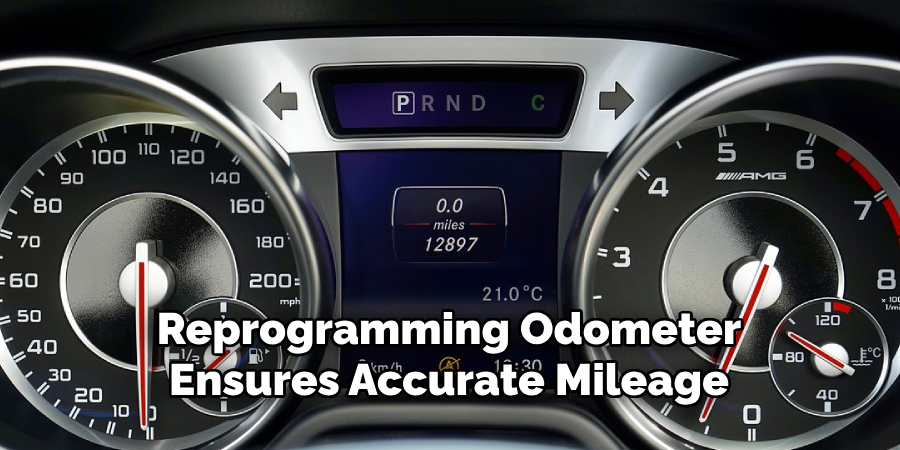
Reprogramming or Recalibrating the Odometer
After completing the necessary repairs, reprogramming or recalibrating the odometer ensures accurate mileage readings. Depending on the system’s or vehicle’s complexity, recalibration may need to be performed either at a dealership or using specialized diagnostic tools.
This process involves resetting or updating the odometer settings to align with the vehicle’s current configuration. Ensure to follow the vehicle manufacturer’s recommendations for recalibration procedures to avoid potential discrepancies in recorded mileage.
A properly recalibrated odometer guarantees the continued accuracy and reliability essential for vehicle maintenance and resale evaluations.
Resetting the Odometer
Power Reset Method
A power reset can sometimes resolve minor odometer glitches by clearing the vehicle’s electronic controls. Begin by safely disconnecting the negative terminal of the vehicle’s battery.
Use a wrench to loosen the terminal clamp and remove it from the battery post. Leave the battery disconnected for at least 5 to 10 minutes. This allows the vehicle’s electronic systems to fully discharge and reset, potentially clearing transient glitches causing the odometer to malfunction.
After waiting, reconnect the negative terminal, ensuring it’s securely fastened. Start the vehicle to check if the odometer returns to normal operation. This straightforward approach can often solve minor issues without additional tools or resources.
Using Diagnostic Tools
For a more thorough diagnostic and reset process, utilize an OBD-II scanner to check for any diagnostic trouble codes (DTCs) related to the odometer. Begin by locating the OBD-II port beneath the dashboard near the driver’s seat.
Connect the scanner to the port, then switch on the vehicle’s ignition to power up the device. Follow the scanner’s instructions to read any stored codes. If DTCs are present, they can be cleared using the scanner. After clearing the codes, restart the vehicle and check if the odometer’s functionality is restored.

This method helps reset the odometer and identifies underlying issues that may require further investigation or repair. Diagnostic tools ensure a comprehensive approach to resolving odometer problems and maintaining vehicle health.
Conclusion
Understanding how to fix blinking odometer involves several key steps that ensure accurate mileage tracking and the vehicle’s overall health. Begin by checking the speed sensor, replacing fuses, and inspecting wiring and connectors for any visible damage.
Reprogramming or recalibrating the odometer may be necessary following these repairs to restore accurate readings. Always utilize the power reset method or diagnostic tools for a comprehensive system evaluation. Preventive maintenance plays a critical role in maintaining the odometer’s performance, helping to prevent issues before they arise.
Addressing odometer malfunctions promptly is paramount, as it protects the vehicle’s value and guarantees reliable performance. Regularly inspecting the components involved in the odometer’s function ensures your car’s longevity and enhances safety and accuracy for all future journeys. Following these steps creates a secure and efficient vehicle operation experience, giving drivers peace of mind on the road.
You can also check it out Xfinity Router Blinking Orange