Are you experiencing a leak in your CO2 system and not sure how to fix it? Don’t panic!
A CO2 leak can be a serious issue, especially in systems where carbon dioxide is heavily utilized, such as beverage dispensers, aquariums, or industrial equipment. Identifying and addressing a leak promptly is crucial to ensure safety, prevent wastage, and maintain the proper functioning of your equipment. Additionally, fixing a CO2 leak can save you money in the long run by reducing your gas consumption.
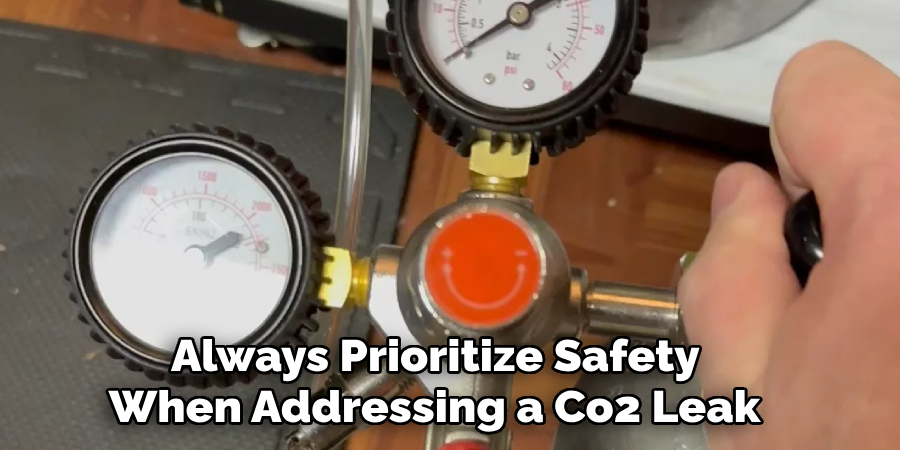
This guide on how to fix a co2 leak will walk you through the steps to detect, locate, and fix a CO2 leak effectively, ensuring you can resolve the issue with minimal disruption and risk. Always prioritize safety and use the appropriate tools and techniques for the task at hand.
What Are the Causes of CO2 Leaks?
There are various reasons why CO2 leaks can occur in equipment that uses compressed gas. Some of the most common causes include:
- Old or Worn-out Equipment: As equipment ages, it may develop cracks or other forms of damage that can cause CO2 to leak out.
- Improper Installation: If the equipment was not installed correctly, it could lead to loose connections or other issues that can result in a CO2 leak.
- Physical Damage: Dropping or mishandling your equipment can also cause damage and create openings for CO2 to escape.
- Corrosion: Over time, exposure to moisture and other elements can cause corrosion on the surface of the equipment, which can lead to cracks and leaks.
What Will You Need?
Before you begin installing your CO2 equipment, there are a few items you will need to have on hand. These include:
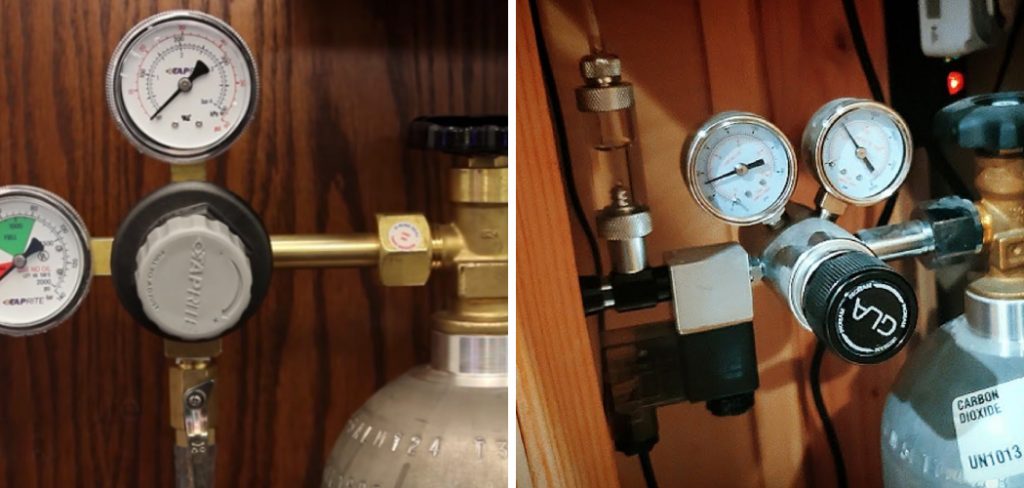
- CO2 Equipment: This includes the tank, regulator, tubing, and any other necessary components for your setup.
- Wrench or Spanner: You may need this tool to properly tighten connections between components.
- Teflon Tape: This tape is used to create a tight seal between threaded connections.
- Rubber Washers/Gaskets: These can provide additional sealing for certain connections.
- Soap/Water Mixture: This solution is used to check for leaks in your system once it is installed.
10 Easy Steps on How to Fix a Co2 Leak
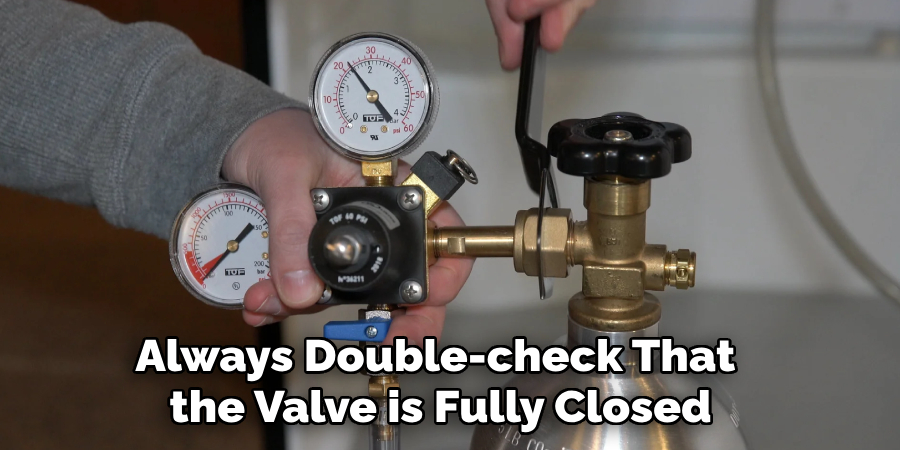
Step 1: Turn Off the CO2 Supply
To begin addressing the CO2 leak, start by turning off the CO2 supply at the cylinder. Locate the main valve on top of the cylinder and turn it clockwise until it is securely closed. This step is crucial to ensure no further gas escapes and provides a safe environment to inspect and fix the issue. Always double-check that the valve is fully closed before proceeding to the next step.
Step 2: Ventilate the Area
After shutting off the CO2 supply, ensure the area is well-ventilated to prevent the accumulation of any lingering CO2 gas. Open windows and doors or use fans to promote air circulation. This step is essential for safety, as high concentrations of CO2 can be hazardous to health. Proper ventilation will create a safer environment for you to proceed with locating and addressing the leak.
Step 3: Inspect Connections
Carefully examine all CO2 connections, including hoses, fittings, and valves, for signs of wear, damage, or improper installation. Look for cracks, loose fittings, or visible leaks, as these are often the primary sources of CO2 leakage. Use a soapy water solution and apply it to the connections while the supply is briefly turned back on; bubbles forming indicate a leak. Address any issues you identify, such as replacing damaged parts or tightening loose connections, before proceeding to test the system further.
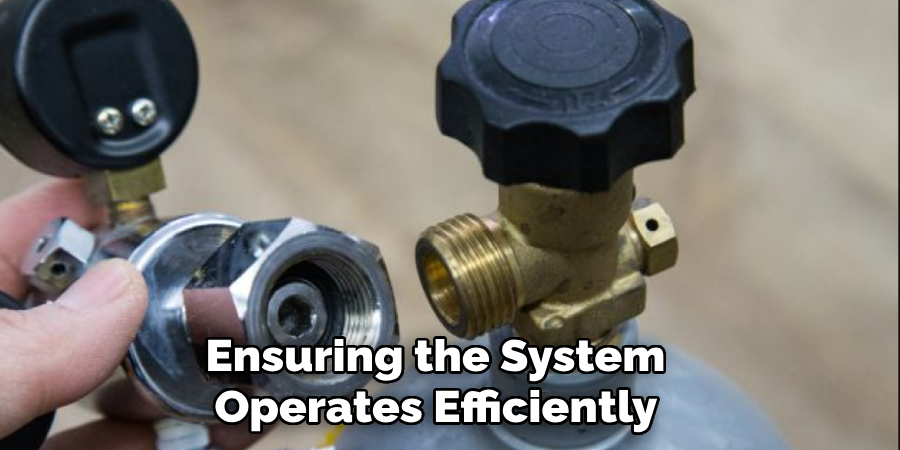
Step 4: Apply a Soap/Water Mixture
To check for potential leaks more effectively, mix a small amount of liquid soap with water to create a soapy solution. Use a spray bottle or a cloth to apply this mixture generously onto all connections, fittings, and valves. Once the mixture is applied, briefly turn on the CO2 supply and observe closely. If you see bubbles forming rapidly at any point, this indicates the presence of a leak. Mark the affected areas and take appropriate corrective actions, such as tightening the connection or replacing faulty components. This step is a crucial part of ensuring the system operates efficiently without unnecessary gas loss.
Step 5: Tighten Loose Components
Ensuring all components are properly tightened is essential for maintaining a secure and efficient system. Begin by inspecting each connection point, including fittings, valves, and hoses, for any signs of looseness. Use the appropriate tools, such as a wrench or screwdriver, to gently tighten these components. Be cautious not to overtighten, as this can damage threads or seals and lead to further issues. Once all components are securely fastened, perform a final check to confirm that everything is firmly in place. This careful attention to detail will help prevent leaks and extend the system’s overall longevity.
Step 6: Replace Faulty Components
Begin by identifying any components that are worn out, damaged, or no longer functioning properly. Common issues to look for include cracks, corrosion, or excessive wear. Once identified, carefully remove the faulty components using the appropriate tools, making sure to follow the manufacturer’s guidelines for disassembly. When selecting replacement parts, ensure they match the specifications of the original components to guarantee compatibility and optimal performance. Install the new parts securely, double-checking that all connections are properly aligned and tightened.
Step 7: Use Teflon Tape or Rubber Washers
Using Teflon tape or rubber washers can help create a watertight seal and prevent leaks. For threaded connections, wrap Teflon tape around the threads in a clockwise direction, ensuring it is applied evenly and covers the threads completely. This will help fill any gaps and ensure a tight fit. For non-threaded connections or areas requiring additional cushioning, use rubber washers. Place the washer securely in position, ensuring it is properly seated to avoid misalignment. Always inspect the seals after installation to confirm there are no visible gaps or wear that could compromise their effectiveness.
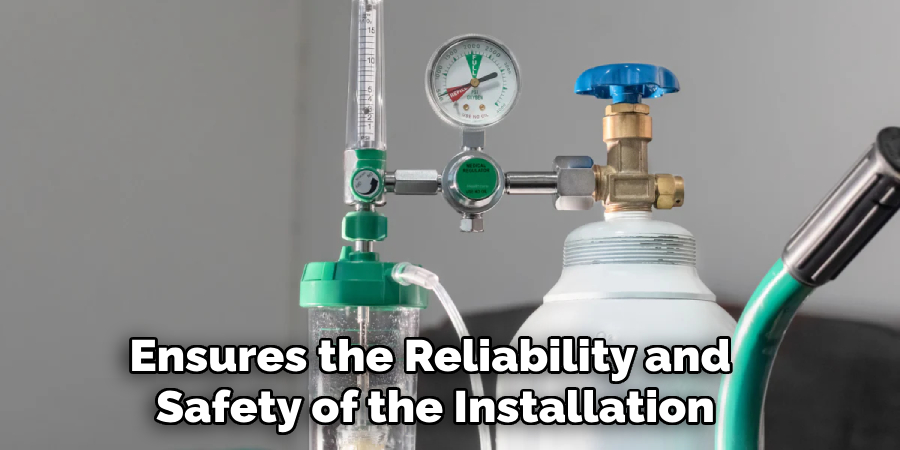
Step 8: Test Again
Once the seals and connections are in place, it is time to perform another round of testing to ensure everything is functioning as expected. Begin by gradually applying pressure or running the system at a low level to check for any leaks or irregularities. Carefully inspect all joints, seals, and connections for signs of wear, misalignment, or gaps. If any issues are detected, pause operation and address them immediately. Once satisfied, gradually increase to full operational capacity and continue monitoring. Proper testing ensures the reliability and safety of the installation.
Step 9: Monitor the System
Once the system is operational, continuous monitoring is essential to ensure it functions efficiently and safely. Regularly observe performance metrics such as pressure, flow rates, or temperature levels, depending on the system’s requirements. Be vigilant for any unusual noises, vibrations, or visual cues that could indicate potential issues. Establish a maintenance schedule that includes routine inspections and timely service to prevent long-term wear and tear.
Step 10: Maintain Regular Inspections
Regular inspections are crucial for ensuring the optimal performance and safety of any system. During these inspections, check all components thoroughly for signs of wear, corrosion, or damage. Pay close attention to critical areas that may be prone to failure and verify that all connections are secure. Use diagnostic tools to measure system performance and compare it to standard operating parameters to identify any deviations. Keep detailed records of each inspection to track trends over time and make informed decisions about necessary repairs or replacements. Consistent maintenance and careful monitoring can help you avoid costly downtime and maintain the system’s efficiency.
By following these steps and implementing a proactive maintenance plan, you can prolong the lifespan of your system and ensure its continued optimal performance.
5 Things You Should Avoid
- Ignoring Safety Precautions
Always prioritize safety when addressing a CO2 leak. Failing to wear proper personal protective equipment (PPE) or ignoring ventilation requirements can lead to serious health issues, as CO2 can displace oxygen and cause suffocation.
- Using Improper Tools or Materials
Avoid using tools or materials that are not designed for handling pressurized or carbon dioxide systems. This can lead to ineffective repairs, further damage, or even dangerous ruptures.
- Bypassing Professional Assistance
If you lack the expertise to handle a CO2 leak, do not attempt to fix it yourself. Improper repairs can exacerbate the problem. Always consult a certified technician when in doubt.
- Neglecting a System Shutdown
Never attempt to repair a CO2 leak while the system is operational. Failing to shut down the system can lead to heightened risks of exposure or uncontrolled releases of gas.
- Ignoring Recurring Issues
Address the root cause of any CO2 leak instead of repeatedly patching the symptom. Ignoring recurring problems may lead to more extensive damage, higher costs, or a complete system failure.
Conclusion
How to fix a co2 leak requires a combination of caution, thorough analysis, and immediate action to ensure safety and prevent further issues.
Always prioritize personal and environmental safety by following proper protocols, such as wearing protective gear and shutting down the system before beginning repairs. Identify the root cause of the leak and opt for long-term solutions rather than quick fixes to ensure reliability. Regular maintenance and proactive monitoring of the system can also play a critical role in preventing future leaks.
By addressing issues promptly and with care, potential hazards can be mitigated effectively.