Sagging floors on the second floor can be both a structural challenge and an aesthetic concern for homeowners.
Addressing this issue is crucial to restore the visual appeal and ensure the safety and integrity of the home’s structure. Several factors, including deteriorating joists, foundation issues, or improper construction might cause the sagging.
This guide on how to fix sagging floors on second floor, aims to equip you with the insight needed to identify the root causes of sagging floors and provides step-by-step solutions to rectify the problem effectively.
Whether you’re planning to tackle these repairs on your own or with the assistance of a professional, understanding the process is the first step to ensuring the longevity and stability of your second-floor spaces.
What Will You Need?
Before jumping into the repair process, gathering all the necessary tools and materials is essential. Here’s a list of items you’ll need to fix sagging floors on the second floor:
- Measuring tape
- Level
- Jacks (either mechanical or hydraulic)
- Shims
- Nails or screws
- Drill
- Plywood sheets for bracing
- Safety equipment (gloves, goggles, etc.)
Once you have all these items, you’ll be ready to start repairing your sagging floors.
10 Easy Steps on How to Fix Sagging Floors on Second Floor
Step 1. Identify the Problem Areas:
Start by thoroughly inspecting the entire second floor to pinpoint where the floors are sagging. Stroll while paying close attention to any dips or uneven areas that may suggest underlying issues.
Use a level to determine the extent of the sagging in different floor sections. It is vital to examine both the visible flooring and the subflooring for indications of damage. Look for signs such as cracks in the walls, sticking door frames and window frames, or creaking sounds underfoot, which may allude to structural deficiencies.
Document these findings with notes and photographs as they will be invaluable during the repair process. Accurately identifying the troubled areas, you set a firm groundwork for a successful and precise repair strategy.
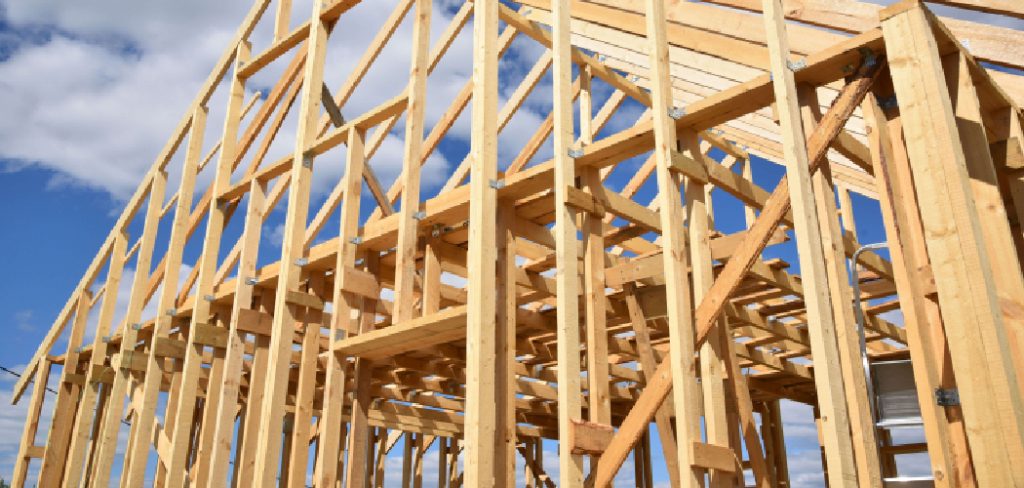
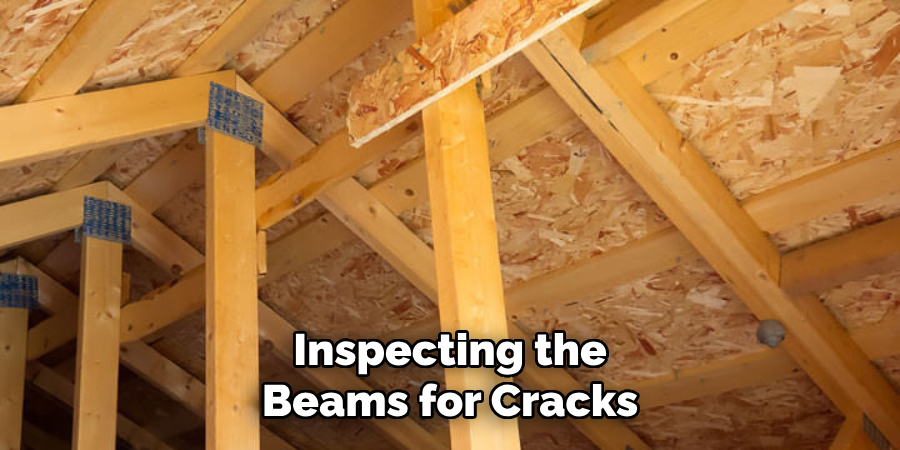
Step 2. Assess the Joists and Support Beams:
After identifying the problem areas, the next step is to examine the joists and support beams beneath the sagging sections. Use a flashlight to inspect for signs of damage such as cracks, rot, or warped wood. It’s crucial to check for moisture, termite damage, or any other factors compromising the structure’s integrity.
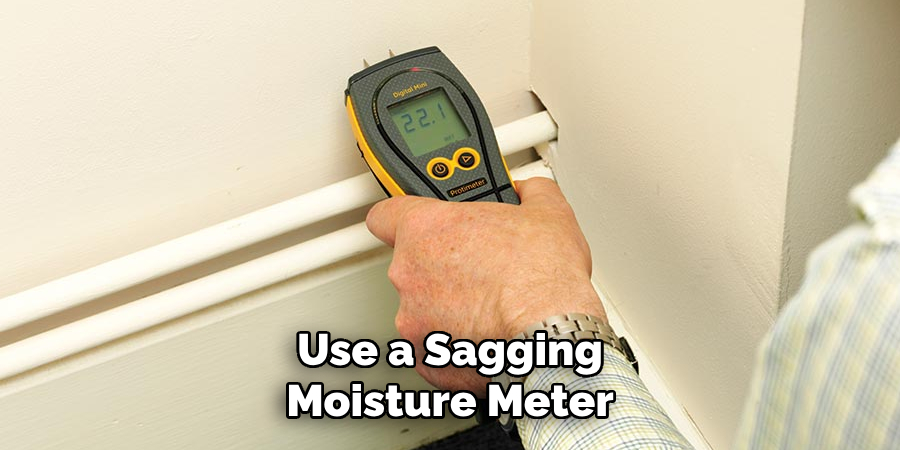
Use a moisture meter to determine if excess moisture is present, as this could contribute to the sagging. In cases where the joists or beams have significant damage or wear, you may need to replace them entirely.
Ensuring that these structural elements are in good condition is critical to supporting the floor above and maintaining the overall stability of your home’s framework.
Step 3. Secure Temporary Support:
Before proceeding with repairs, it’s essential to provide temporary support to the sagging areas to prevent further damage and to create a safer working environment.
Using mechanical or hydraulic jacks, gently lift the sagging sections of the floor, being careful not to raise them too quickly, which might cause cracking or additional stress elsewhere.
Place the jacks under the joists in the affected area and incrementally adjust them, gradually allowing the floor to return to a level position. Add shims between the joists and beams to provide extra support as you work on replacing or reinforcing the damaged parts.
This temporary support will secure the structure and stabilize it throughout the repair process, allowing you to proceed confidently and precisely.
Step 4. Replace or Reinforce Damaged Joists:
With temporary support, you can now focus on addressing damaged joists. If a joist is cracked or severely weakened, it may require replacement. To do this, measure the old joist and cut a new one to the appropriate length.
Securely position the new joist alongside the old one using nails or screws, ensuring it can support the weight of the floor above. In some cases, reinforcing the existing joist with a sister joist may be sufficient.
This involves attaching a new joist directly to the existing one to provide additional support. Ensure both ends of the joist rest firmly on load-bearing supports to maintain structural integrity.
Step 5. Reinforce Support Beams:
Once the damaged joists have been addressed, it’s time to evaluate and reinforce the support beams, especially if they show signs of stress or weakness. Begin by inspecting the rafters and beams for cracks, warping, or decay.
If reinforcement is necessary, use plywood sheets or metal plates to strengthen these structural components. Cut the reinforcement materials to the appropriate size and secure them using solid screws or bolts.
If a beam requires replacement, ensure the new beam is of proper load-bearing capability and place it securely within the structure, resting on adequate supports.
Strengthening support beams is crucial for the long-term durability of your second floor, preventing future occurrences of sagging and ensuring a safe living environment.
Step 6. Re-level the Floor:
With the structural components repaired or reinforced, you can focus on adjusting the floor to eliminate any remaining uneven surfaces. Begin using a level to scrutinize the floor’s surface and identify areas requiring correction.
Slowly lower the jacks providing temporary support, ensuring the floor settles gradually and evenly. As you release the jacks, place shims between joists and flooring as needed to fill gaps and provide additional support.
Make minor levels adjustments throughout this process until the floor is uniformly leveled. By carefully re-leveling the floor, you’ll enhance its appearance and ensure a more comfortable and structurally sound living space.
Step 7. Repair the Subfloor If Needed:
After re-leveling the floor, inspect the subfloor for any damage that might have occurred due to the sagging. Check for signs of rot, water damage, or structural weaknesses.
If damaged sections are found, cut and remove the affected subfloor areas using a circular saw, ensuring to work carefully around any plumbing or wiring. Replace the removed sections with new, moisture-resistant subfloor panels, and secure them with screws to the underlying joists.
Ensure all newly installed subfloor pieces are flush and level with the existing structure. This repair process fortifies the foundation your flooring rests upon and helps prevent future issues that could arise from compromised subflooring.
Step 8. Replace the Finished Flooring:

With the subfloor repaired and the structural integrity restored, it’s time to lay down the finished flooring. Begin by choosing replacement materials that match or complement your existing flooring for a seamless look.
Clean and prepare the surface, ensuring it is free of debris and dust. If using planks or tiles, start at one end of the room and work across, securing each piece with adhesive, nails, or any necessary fasteners based on the flooring type.
Pay close attention to the alignment and spacing to maintain an even surface. Once the new flooring is installed, check for misalignments or raised edges and adjust as needed.
Finally, reinstall any baseboards or trim that were removed during the process to complete the renovation, ensuring a polished and cohesive finish to your newly stabilized second floor.
Step 9. Inspect and Clean Up:
With the flooring installation complete, the final step involves a thorough inspection and clean-up. Carefully examine the entire area to ensure all structural and aesthetic repairs meet the required standards.
Look for gaps, uneven surfaces, or loose fittings that may need additional attention. Once satisfied with the repairs and installations, proceed with cleaning the area. Remove any leftover debris, tools, and materials that may still be present to leave the space tidy and ready for use.
Step 10. Monitor the Results
After completing the repair and renovation process, monitoring the second floor over time is essential to ensure continued stability and performance. Regularly check for any movement, creaking, or sagging that might indicate underlying issues.
Pay attention to changes in humidity or temperature, as these can affect the materials and structure of your flooring. Conduct periodic inspections of the visible floor and the underlying support structures to catch potential problems early.
By staying vigilant and addressing any concerns promptly, you’ll maintain the longevity and safety of your renovated space, protecting your investment and ensuring a comfortable living environment.
By following these steps and taking a systematic approach, you can successfully repair sagging second-floor floors in your home. Remember always to prioritize safety and consult with professionals if needed for complex repairs or structural issues.

Conclusion
How to fix sagging floors on second floor requires a comprehensive approach that emphasizes structural integrity, attention to detail, and quality materials.
You ensure a robust and long-lasting solution by systematically following steps such as identifying the problem areas, reinforcing joists and beams, re-leveling the floor, repairing the subfloor, and finally replacing the finished flooring.
Regular monitoring and maintenance post-repair also play a key role in preserving the condition of the flooring and preventing future issues. Always prioritize safety and consult professionals for complex repairs.
With careful execution and vigilance, you can restore your living space’s safety and comfort, enhancing its aesthetic appeal and functional use.