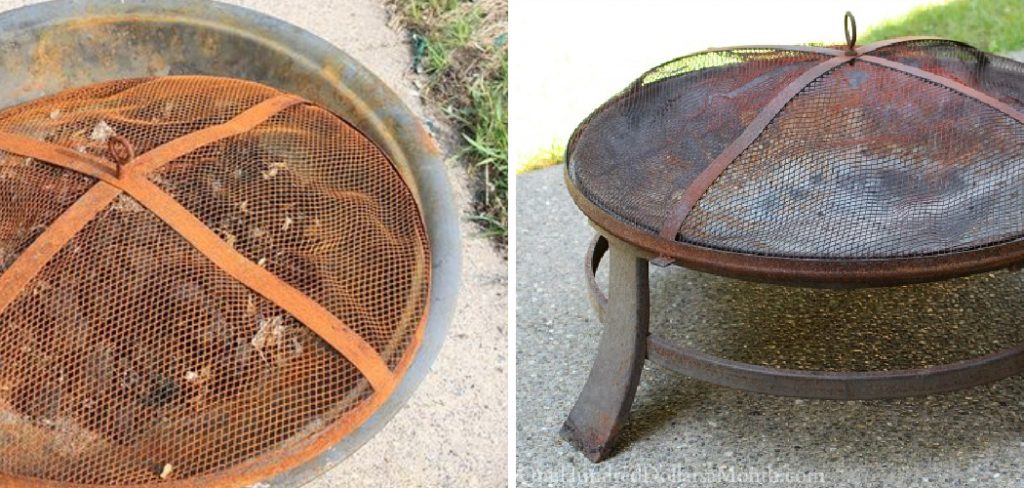
As the fall chill settles in, there’s nothing quite like gathering around an outdoor fire with family and friends. But if your fire pit has seen better days and shows signs of rust, don’t throw it out just yet! With just a few inexpensive materials and a little elbow grease, you can restore even a heavily rusted fire pit to its former glory.
In this post, I’ll walk you through the simple steps to remove rust, patch any holes or cracks, and reseason your fire pit so you can enjoy many more nights telling stories and roasting marshmallows beneath its glow.
From assessing the damage to applying the finishing touches, I’ll cover everything you need to know about how to fix a rusted fire pit and make new memories around its cheerful flames this season.
What Will You Need?
Before we get started, here’s a list of materials you’ll need to gather beforehand:
- Wire brush
- Steel wool
- Sandpaper or sanding block
- Metal filler (such as Bondo)
- Putty knife
- Rust converter (such as Rust-Oleum)
- High heat spray paint
- Vegetable oil or lard for seasoning
- Safety gear (gloves, safety glasses)
Once you have all the necessary tools and materials, you can start restoring your rusted fire pit!
10 Easy Steps on How to Fix a Rusted Fire Pit
Step 1: Assess the Damage
The first step in fixing a rusted fire pit is to assess the damage. Take a close look at your fire pit and determine how severe the rust is. If it’s just surface rust, you can remove it easily with a wire brush or steel wool. If the rust has caused holes or cracks in the metal, you’ll need to patch those before moving on to removing the rust.
Step 2: Remove the Rust
Start by wearing your safety gear. Use the wire brush to scrub off as much rust as possible from the fire pit. This will help remove loose and flaking rust. Steel wool can be used for stubborn rust that doesn’t come off with the wire brush. Apply a little pressure and scrub in a circular motion.
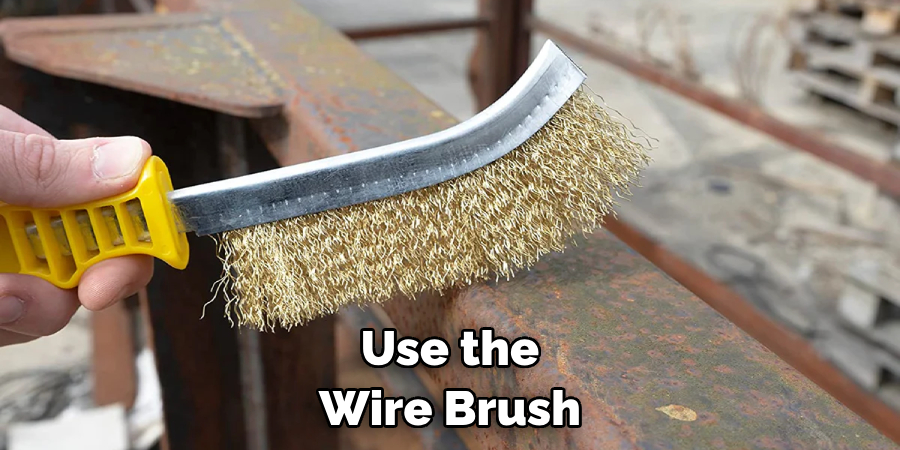
If the rust persists, use sandpaper or a sanding block to sand the area until the rust is completely gone. Make sure to do this step meticulously, as a clean surface is crucial for further steps. After this, thoroughly clean the fire pit and let it dry.
Step 3: Apply the Metal Filler
Once the rust is completely removed and the fire pit is dry, it’s time to deal with any holes or cracks that may be present. Put on your gloves, take some Metal Filler (Bondo), and spread it over the damaged areas using the putty knife. Press it into the holes or cracks for a seamless finish. Let the filler dry as per the instructions on the package.
Step 4: Sand the Filled Areas
After the metal filler has dried, you must sand the filled areas to create a smooth surface. Using sandpaper or a sanding block, gently sand over the served areas until they align with the rest of the fire pit. Wipe away any dust created during the sanding process.
Step 5: Apply Rust Converter
Next, it’s time to apply the rust converter. This product will react with any remaining rust and stop it from spreading further. Following the instructions on the package, apply a liberal amount of rust converter to all areas of the fire pit, ensuring you cover each nook and cranny. Allow it to dry completely before moving on to the next step.
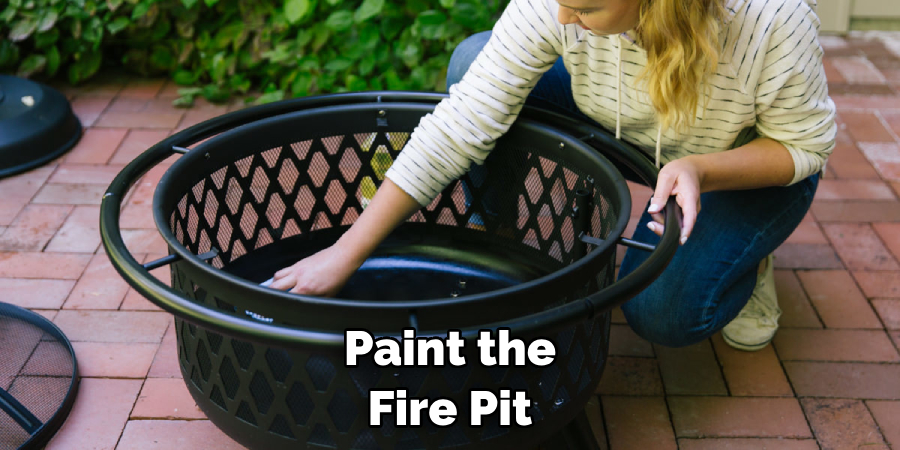
Step 6: Paint the Fire Pit
After the rust converter has completely dried, you are ready to paint the fire pit. This not only improves the appearance of the fire pit but also provides a layer of protection against future rusting. Choose a high heat-resistant spray paint that’s specifically designed for use on fire pits and barbecues. Spray in a steady back-and-forth motion, covering all areas of the fire pit. Leave to dry according to the paint’s instructions. Apply a second coat if necessary.
Step 7: Season the Fire Pit
The final step in this process is to season the fire pit. Like you would season a cast iron pan, spicing your fire pit can help create a natural barrier against rust. Use a cloth or a brush to apply a thin layer of vegetable oil or lard all over the fire pit, inside and out. Then, build a small fire and let it burn for about an hour.
The heat will allow the oil to penetrate the metal and create a rust-resistant coating. Once the fire pit has cooled, it’s ready for use again. Congratulations, you’ve successfully restored your rusted fire pit!
Step 8: Regular Maintenance
After all this hard work, the last thing you want is for your fire pit to rust again. Regularly clean the fire pit after use to prevent future rust, removing any ash or debris. Dry it thoroughly as well to avoid water-induced rust. Periodically apply a new coat of high-heat-resistant paint, and season the fire pit every few months to maintain its rust-resistant coating. With proper care and maintenance, your fire pit will continue to serve as a cozy gathering spot for many seasons.
Step 9: Enjoy Your Fire Pit
After all the hard work of restoring your fire pit, it’s time to sit back, relax, and enjoy! Gather with your friends or family, add some logs, and light a fire. Whether you’re roasting marshmallows, sharing stories, or simply watching the flames dance, there’s nothing quite like the warmth and ambiance of a fire pit. So kick back, enjoy the fruits of your labor, and create memorable moments around your newly restored fire pit. Remember to practice fire safety and fully extinguish the fire when finished.
Step 10: Safety Precautions
Your fire pit has been restored and is ready for use, but safety should always be a priority when dealing with fire. Always keep a fire extinguisher or a bucket of water nearby when using the fire pit. Avoid using the fire pit on very windy days, as the wind can cause the flames to spread uncontrollably.
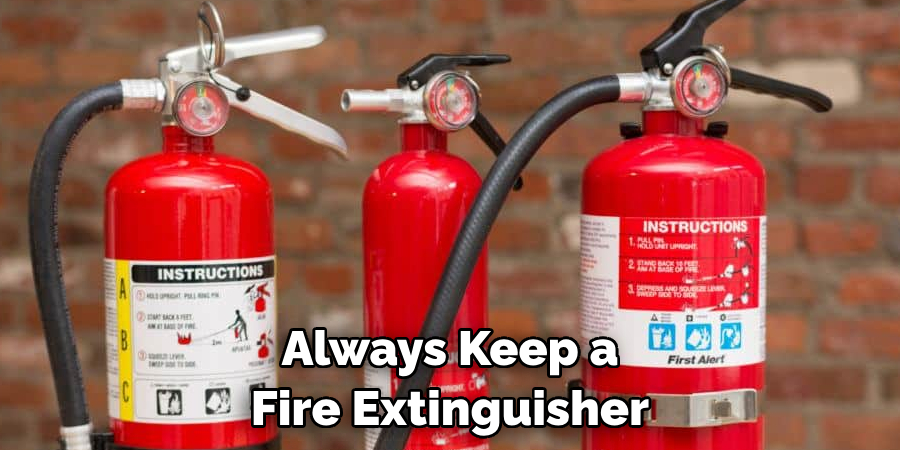
Never leave the fire unattended, and make sure the fire is completely out before going inside. With these safety measures in mind, you can comfortably enjoy your rejuvenated fire pit while keeping yourself and your surroundings safe.
Following these ten easy steps, you can quickly fix a rusted fire pit and enjoy it for many more seasons.
5 Additional Tips and Tricks
- Use Protective Coating: After you’ve cleaned and repaired your fire pit, consider applying a high-heat-resistant protective coating. This will provide additional protection against the elements, reducing the chances of future rusting.
- Regular Maintenance: Regularly remove ashes and debris from the fire pit. This prevents moisture build-up, which can lead to rust over time.
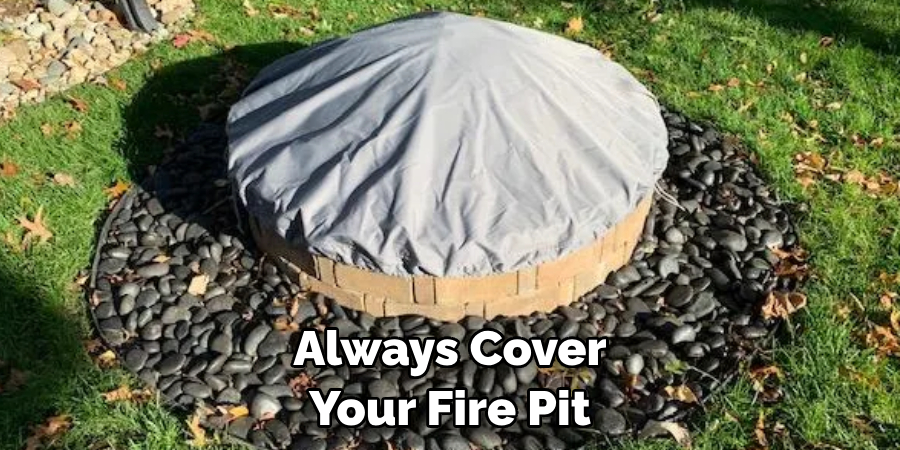
- Weatherproof Covers: Invest in a weatherproof cover for your fire pit. When not in use, cover it to protect it from rain and moisture that can cause rust.
- Rust Converter: You can use rust converter products if you come across stubborn rust patches. These products convert rust into a paintable surface, helping to prevent further damage.
- Avoid Salt: If you’re using your fire pit in a coastal area, salt air can accelerate rusting. Rinse your fire pit frequently, or consider using a rust-resistant paint to provide added protection.
With these additional tips and tricks, you can keep your fire pit in top condition for many years.
5 Things You Should Avoid
- Ignoring Small Rust Spots: Tiny rust spots might seem insignificant now, but they can quickly grow into larger patches if ignored. Address these spots immediately to prevent more extensive damage.
- Using Harsh Chemicals: While it might be tempting to use potent cleaning agents to remove rust, these can cause more harm than good. Stick to mild detergents or appropriate rust removal products.
- Letting Fire Pit Sit Wet: After cleaning or using your fire pit, make sure it’s thoroughly dry before you cover it or leave it outdoors. Moisture is a prime contributor to rust.
- Not Using a Protective Cover: Even if the weather looks fine, always cover your fire pit when not in use. Unexpected rain could lead to unnecessary exposure to moisture.
- Burning Pressure-Treated Wood: This type of wood can release harmful chemicals when burned, accelerating the rusting process. Always use untreated, dry wood in your fire pit.
By avoiding these common mistakes, you can ensure that your fire pit remains rust-free and continues to provide warmth and ambiance for years to come. Remember to regularly inspect and maintain your fire pit, as catching and addressing potential issues early on can save you time and money in the long run.
Conclusion
Finally, fixing a rusted fire pit is no small task. With the right supplies, some elbow grease, and determination, you can quickly restore your fire pit to its former glory. Don’t let the thought of rust or wear discourage you – everything has a solution. Take the initiative to bring back the beauty of your rusty fire pit by following these simple steps, and never fear to venture outdoors with family members in tow!
Hopefully, the article on how to fix a rusted fire pit has been helpful and informative. Use these tips to ensure that your fire pit stays in top condition and can be enjoyed for many more nights to come.
All it takes is for us to act and take pride in our backyard fireside moments again. So what are you waiting for? Start restoring your fire pit today!